Table of Contents:

Image: carbrain.com
- Introduction
- Identifying Undercarriage Damage
- Safety Precautions
- Tools and Materials
- Step-by-Step Repair Process
- Preventing Future Damage
- Conclusion
Introduction
The undercarriage of a vehicle, often referred to as the chassis or frame, serves as a vital structural foundation that supports its entire weight and bears the brunt of external forces. When subjected to impacts, collisions, or prolonged exposure to harsh road conditions, the undercarriage may sustain varying degrees of damage that can compromise its integrity and the vehicle’s overall performance. Recognizing the importance of addressing undercarriage damage promptly, this comprehensive guide aims to provide a step-by-step approach to repairs, ensuring the vehicle’s stability and longevity.
Identifying Undercarriage Damage
Assessing undercarriage damage requires a thorough inspection that goes beyond mere visual cues. Here are some telltale signs to watch out for:
- Sagging or Deformed Structure: Inspect the undercarriage for any visible bends, dents, or distortions, especially around crucial components like suspension mounts, axles, and exhaust system components.
- Broken or Cracked Components: Examine the undercarriage for cracked or broken welds, braces, or brackets that support the vehicle’s structure or its various systems.
- Loose or Disconnected Parts: Check for any loose bolts, nuts, or mounts that may have become detached due to impacts or vibrations, potentially affecting alignment and stability.
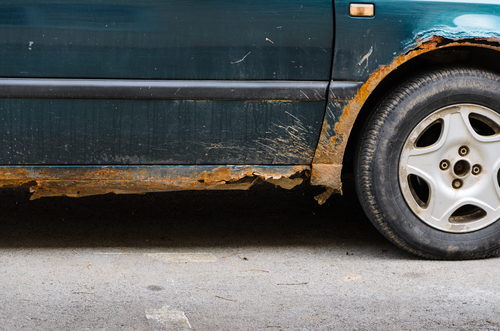
- Rust or Corrosion: Rust spots or advanced corrosion on the undercarriage components indicate potential structural weakness and may require immediate attention.
- Fluid Leaks: Observe the undercarriage for leaks or drips of fluids such as oil, coolant, or fuel, which may signify damaged seals or gaskets.
Safety Precautions
Before attempting any undercarriage repairs, prioritize your safety by implementing the following precautions:
- Secure the Vehicle: Engage the parking brake firmly and place wheel chocks behind the wheels opposite the damaged area to prevent the vehicle from rolling.
- Wear Protective Gear: Protect yourself with gloves, safety glasses, and appropriate clothing that covers your arms and legs, as you will be working under the vehicle.
- Use Proper Lighting: Ensure adequate lighting conditions beneath the vehicle to enhance visibility and prevent errors.
- Take Precautions with Fluid Leaks: Avoid contact with leaking fluids, such as oil or gasoline, by wearing gloves and placing drip pans underneath potential sources of leaks.
- Be Aware of Sharp Edges: Damaged undercarriage components may have sharp edges, so exercise caution to prevent cuts or injuries.

Image: primesourceco.com
Tools and Materials
Depending on the extent of the undercarriage damage, you may require a variety of tools and materials for efficient repairs. Here’s a general list of essentials:
- Set of wrenches (various sizes)
- Socket wrench set
- Jack and jack stands
- Welder (in case of broken welds)
- Metal cleaner or degreaser
- Sanding paper or grinding tool
- Hammer and chisel (for straightening dents)
- Anti-rust paint or undercoating material
- Replacement parts (if necessary)
Step-by-Step Repair Process
To ensure successful undercarriage repairs, follow this step-by-step guide:
- Identify and Assess Damage: Thoroughly inspect the undercarriage to pinpoint the extent and location of damage.
- Prepare the Vehicle: Secure the vehicle, wear protective gear, and arrange for proper lighting.
- Clean the Damaged Area: Remove dirt, grease, or rust from the affected area to facilitate better adhesion of repair materials.
- Straighten Dents or Deformations: Use a hammer and chisel to carefully straighten out minor dents or deformations, but avoid overdoing it to prevent further damage.
- Repair or Replace Broken Components: Extensive damage or cracks in structural components may require welding or replacement of affected parts.
- Tighten Loose Bolts or Mounts: Inspect and securely tighten any loose bolts, nuts, or mounts to ensure proper alignment and stability.
- Apply Anti-Rust Treatment: Thoroughly clean and apply anti-rust paint or undercoating material to the repaired areas to prevent future corrosion.
- Lubricate Moving Parts: If necessary, lubricate moving parts, such as suspension components, to maintain smooth operation.
- Test and Re-inspect: Once repairs are complete, conduct a test drive or thorough inspection to ensure the undercarriage is functioning correctly.
Preventing Future Damage
To minimize the risk of future undercarriage damage, consider these preventive measures:
- Regular Inspections: Periodically examine the undercarriage for any signs of damage, such as rust, dents, or loose components.
- Avoid Rough Roads: As much as possible, avoid driving on rough or uneven roads, particularly at high speeds, to minimize impact-related damage.
- Install Undercarriage Guards: If you frequently drive in harsh conditions, consider installing undercarriage guards or skid plates to protect vulnerable components.
- Proper Maintenance: Adhere to regular maintenance schedules for suspension components, brakes, and tire alignment to ensure the undercarriage remains in top condition.
- Professional Inspections: Consult a mechanic for professional undercarriage inspections, especially after significant impacts or if you suspect potential damage.
How To Fix Undercarriage Damage
Conclusion
Addressing undercarriage damage promptly is crucial for maintaining the safety and performance of your vehicle. Whether it’s a minor dent or a more severe structural issue, timely repairs ensure that the vehicle’s integrity and stability are not compromised, minimizing the risk of future accidents. By following the step-by-step repair process outlined in this guide, practicing preventive measures, and consulting with a mechanic when necessary, you can effectively extend the lifespan of your vehicle and ensure it continues to serve you reliably for miles to come.