Find out the information you need about How To Replace A Light Switch On A Ceiling Fan in this article, all summarized clearly by us.
How to Replace a Ceiling Fan Light Switch: A Step-by-Step Guide
When I recently moved into my new home, I noticed that the ceiling fan in the living room had a faulty light switch. It would flicker and sometimes wouldn’t turn on at all. Determined to fix it myself, I embarked on a journey to replace the light switch, and I’m sharing my experience and guidance with you today.
Understanding the Parts of a Ceiling Fan Light Switch
A ceiling fan light switch typically consists of two main components: the switch itself and the canopy. The switch is the part you use to control the lighting of your ceiling fan, while the canopy conceals the electrical wires and provides a base for the switch.
Step-by-Step Instructions for Replacing a Ceiling Fan Light Switch
Materials:
- Screwdriver (Phillips or flathead, depending on the screw type)
- New ceiling fan light switch
- Electrical tape or wire nuts
- Ladder (if necessary)
Instructions:
-
Turn off the power: Before starting any electrical work, it’s crucial to turn off the power supply to the ceiling fan at the electrical panel. This ensures your safety by preventing potential electrical shocks.
-
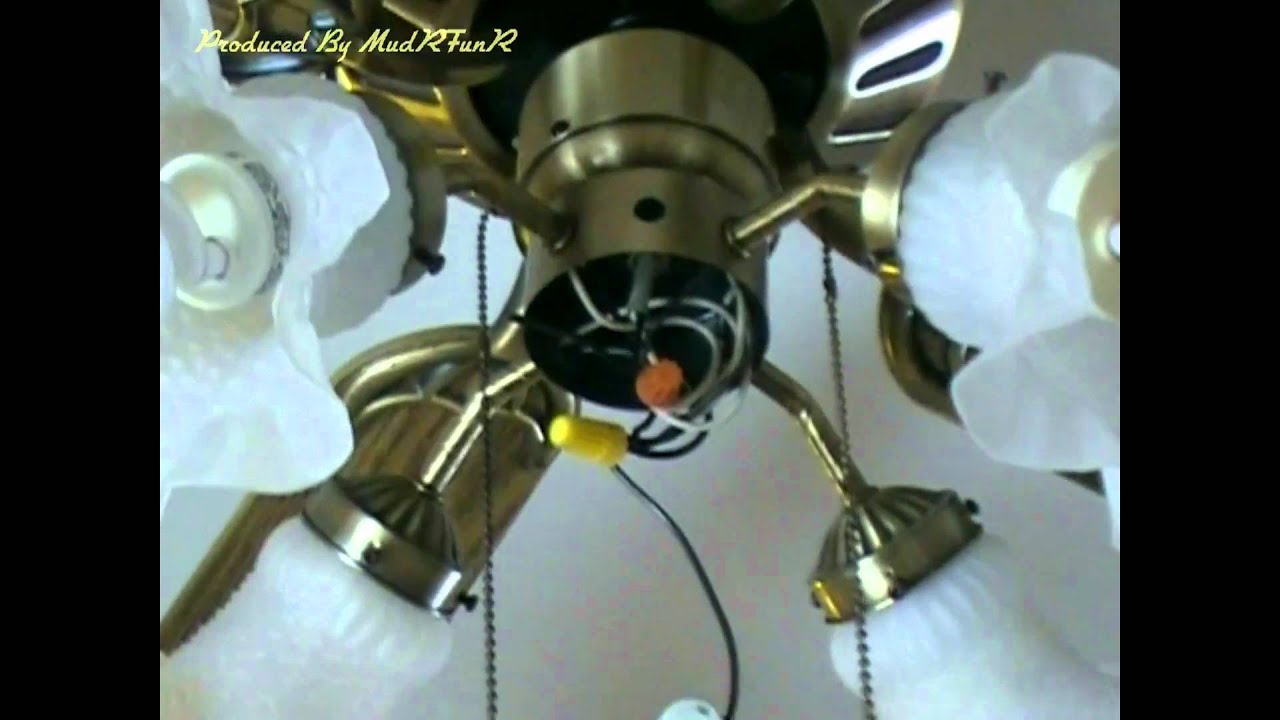
Remove the canopy: Using a screwdriver, carefully unscrew the screws holding the canopy in place. Once the screws are removed, gently pull down the canopy to expose the electrical wires.
-
Disconnect the old switch: Locate the wires connected to the old switch. These wires may be connected using wire nuts or electrical tape. Carefully disconnect the wires from the switch by unscrewing the wire nuts or removing the electrical tape.
-
Remove the old switch: Once the wires are disconnected, remove the old switch by unscrewing the screws that hold it in place.
-
Connect the new switch: Take the new light switch and connect the wires to the appropriate terminals. Typically, black wires connect to brass terminals, white wires connect to silver terminals, and green wires (ground) connect to green or bare copper terminals. Secure the connections using wire nuts or electrical tape and ensure they are tight.
-
Mount the new switch: Insert the new switch into its designated space in the canopy. Tighten the screws to secure it firmly in place.
-
Reassemble the canopy: Carefully lift the canopy back into position and secure it with the screws.
-
Turn on the power: Once the canopy is in place, return to the electrical panel and restore power to the ceiling fan.
-
Test the switch: Operate the light switch to confirm that it is functioning properly.
Tips and Expert Advice
-
Choose the right switch: When selecting a replacement light switch, ensure it is compatible with your ceiling fan. Various types of switches are available, including toggle switches, rotary switches, and pull chains. Choose one that fits your fan’s existing wiring and design.
-
Use a voltmeter to verify: Before connecting the wires to the new switch, use a voltmeter to ensure that the wires are not live. This will provide an additional safety measure and help prevent potential electrical accidents.
-
Secure the connections: Ensure that all wire connections are secure and insulated with wire nuts or electrical tape to prevent potential electrical hazards.
-
Be patient and careful: Replacing a ceiling fan light switch requires precision and patience. Take your time and follow the steps carefully to ensure a safe and successful repair.
-
Seek professional assistance if needed: If you encounter any difficulties or are uncomfortable performing electrical work, do not hesitate to contact a qualified electrician for assistance.
Frequently Asked Questions (FAQs)
Q: What are the signs of a faulty ceiling fan light switch?
A: Signs of a faulty ceiling fan light switch include flickering lights, failure to turn on or off, or intermittent operation.
Q: What safety precautions should I take when replacing a light switch?
A: Safety precautions include turning off the power at the electrical panel, using a voltmeter to verify that the wires are not live, and wearing gloves to protect your hands.
Q: Can I connect a dimmer switch to my ceiling fan?
A: Yes, it is possible to connect a dimmer switch to your ceiling fan. However, it is important to ensure that your ceiling fan is compatible with dimmer switches and to select an appropriate dimmer switch for the fan’s electrical specifications.
Conclusion
Replacing a ceiling fan light switch can be a simple and straightforward task with the proper preparation and safety measures. By following the steps outlined in this article and adhering to the tips provided, you can effectively repair your ceiling fan and restore its lighting functionality. Remember to always prioritize safety and consult a professional if you encounter any difficulties or have concerns about working with electrical components.
Would you like to further explore the topic of ceiling fan light switch replacement? Let me know if you have any additional questions or if there’s anything else I can assist you with.
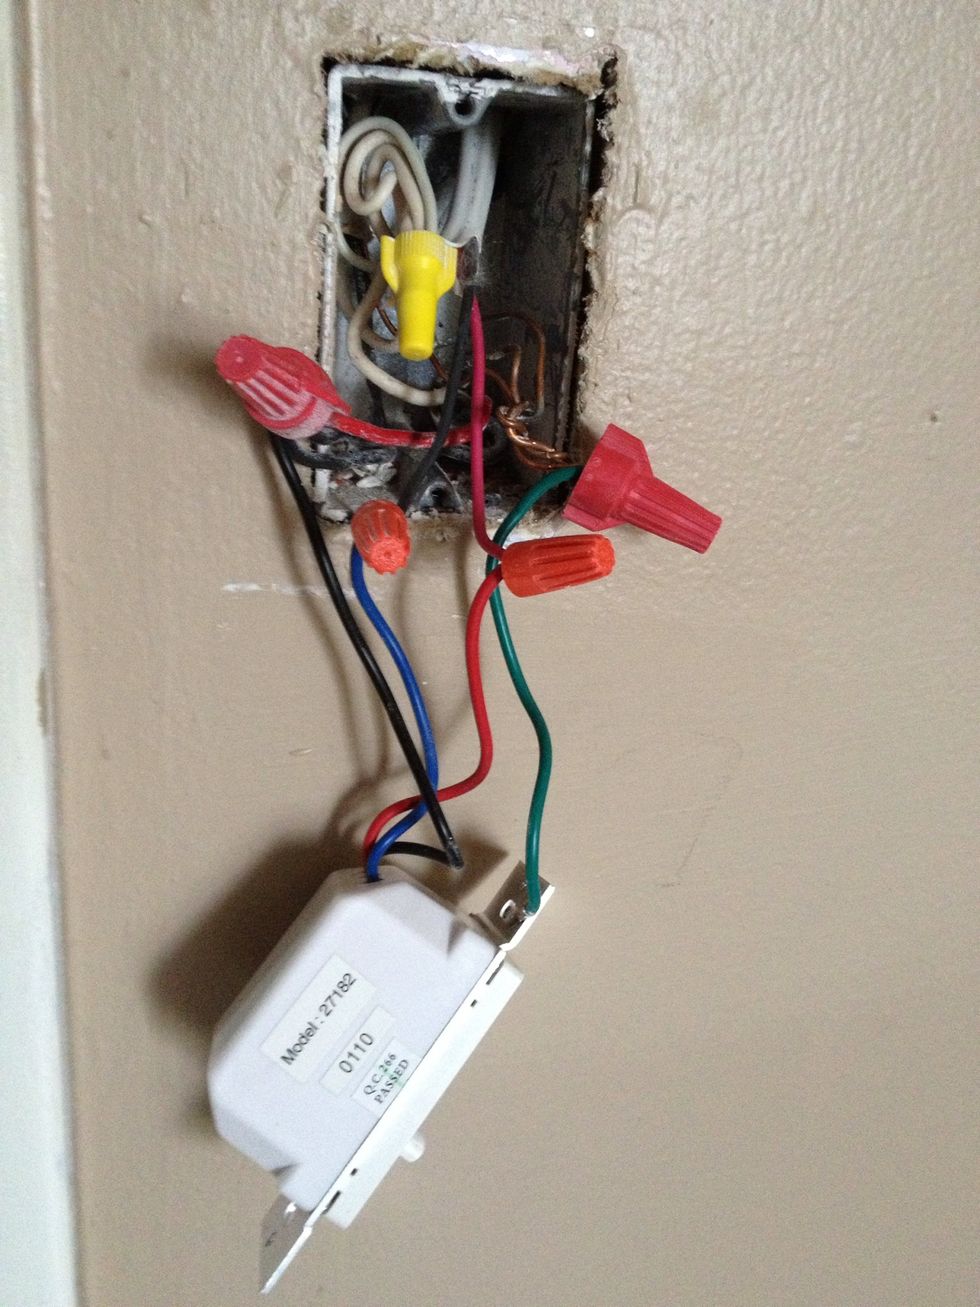
Image: guides.brit.co
Thank you for visiting our website and taking the time to read How To Replace A Light Switch On A Ceiling Fan. We hope you find benefits from this article.