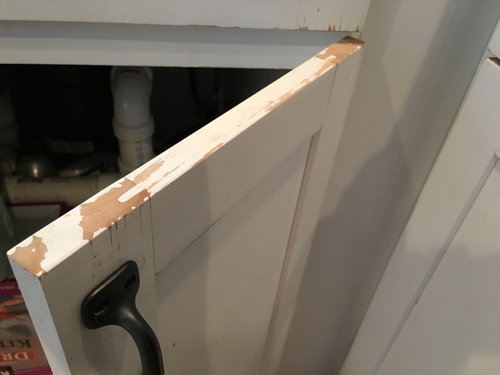
It can be frustrating and disheartening to discover chips or damage on the surface of your laminate cabinets. These durable and affordable fixtures are common in homes and kitchens, but they can be susceptible to nicks, scratches, and even dents. However, don’t despair! Restoring the beauty of your laminate cabinets is entirely possible with the right approach and a bit of elbow grease. This comprehensive guide will lead you through a step-by-step process to repair chipped laminate cabinets, empowering you to restore their pristine condition and enhance the aesthetics of your living space once more.

Image: www.hometalk.com
Understanding Laminate and Its Composition
Laminate, also known as Formica, is a cost-effective and durable material often used in the construction of cabinets, countertops, and even flooring. Composed of several layers, laminate typically consists of a high-density fiberboard core topped with a decorative paper and a protective top layer made of melamine resin, which provides resistance to wear, heat, and moisture. While laminate surfaces are generally robust, impact or mishandling can occasionally cause chips or damage to the surface.
Assessing the Damage and Preparing for Repair
The extent of the damage will determine the appropriate repair method. For shallow chips that do not penetrate through the laminate’s surface, simple touch-up techniques may suffice. However, for deeper chips that expose the substrate or fiberboard core, more comprehensive repair measures are necessary.
Before embarking on the repair process, it’s crucial to clean the affected area thoroughly. Using a damp cloth and mild detergent, gently remove any dirt or debris from the chipped surface. Allow the area to dry completely before proceeding further.
Repairing Shallow Chips: Touch-Up Techniques
For shallow chips that have not breached the laminate’s surface, employing a touch-up marker or repair kit designed specifically for laminate materials is recommended. These products typically come in a variety of colors to match the finish of your cabinets and are applied directly to the damaged area using a fine-tipped brush or applicator.
Allow the touch-up solution to dry completely as per the manufacturer’s instructions, typically ranging from a few minutes to several hours. Once dry, use a clean, soft cloth to gently buff the repaired area, blending it seamlessly with the surrounding surface.

Image: www.cintronbeveragegroup.com
Restoring Deep Chips: Filling and Refinishing
Deeper chips that have penetrated the laminate’s surface may require a more extensive repair process involving filling and refinishing. This approach necessitates meticulous attention to detail and matching the color and texture of the surrounding laminate to achieve a seamless repair.
Begin by carefully cleaning the chipped area and any loose debris. Next, using a wood filler or epoxy designed for laminate repair, meticulously fill the chip, taking care to avoid overfilling. Allow the filler to cure completely, which may take several hours or even overnight, depending on the product used.
Once the filler has set, sand the repaired area smoothly using fine-grit sandpaper. Start with a higher grit (e.g., 120-grit) to remove excess filler and gradually progress to a finer grit (e.g., 220-grit) to achieve a smooth finish. The goal is to create a level surface that seamlessly blends with the surrounding laminate without any noticeable edges or bumps.
To restore the original color and texture of the laminate, apply a color-matched laminate repair solution or touch-up marker to the repaired area. Carefully follow the manufacturer’s instructions for application and drying time. Once dry, gently buff the repaired area with a soft cloth to blend it seamlessly into the surrounding laminate.
How To Fix Chipped Laminate Cabinets
Prevention: Tips to Safeguard Your Laminate Cabinets
While laminate cabinets are designed to withstand wear and tear, certain preventive measures can help prolong their lifespan and minimize the risk of chips or damage:
- Avoid placing sharp objects directly on laminate surfaces to prevent scratches or nicks.
- Use cutting boardsp