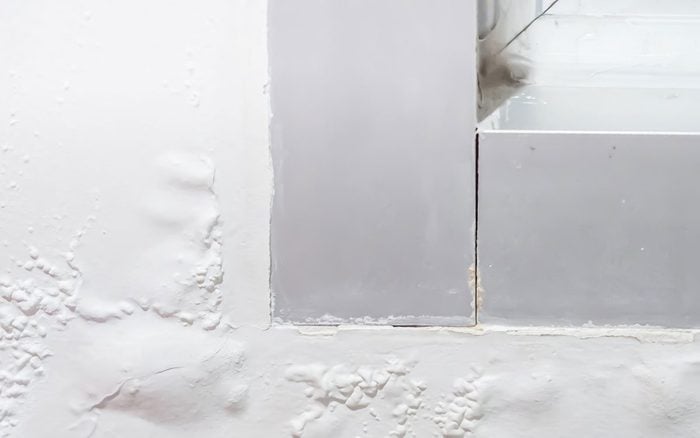
If you’ve ever encountered paint bubbling on your walls, you likely know how frustrating and unsightly it can be. Whether it’s a small patch or an extensive area, bubbling paint disrupts the aesthetics of your home and poses potential underlying issues.

Image: www.colourlifepainting.com.au
Understanding the causes and effective solutions to address bubbling paint is crucial. This comprehensive guide will equip you with the knowledge and practical steps to restore your walls to their flawless finish.
Identifying the Causes of Paint Bubbling
To effectively address paint bubbling, it’s essential to identify the root cause. Here are some common culprits:
- Moisture: Excessive moisture beneath the paint surface, originating from leaks, condensation, or water damage, causes the paint’s adhesion to weaken, resulting in bubbling.
- Improper Surface Preparation: Applying paint on dirty, greasy, or uneven surfaces can compromise its adhesion, leading to bubbling over time.
- Excessive Paint Application: Applying thick layers of paint without allowing sufficient drying time can trap moisture and air beneath, causing bubbles to form.
- Incompatible Paint or Primer: Using incompatible paints or primers can result in chemical reactions that weaken the paint’s bond, leading to bubbling.
- Poor Ventilation: Inadequate ventilation during painting or the drying process can cause moisture and fumes to get trapped beneath the paint, contributing to bubble formation.
Expert Tips to Repair Paint Bubbling
Once you’ve identified the root cause, you can proceed with the repair process. Here are some expert tips:
- Identify and Fix Moisture Problems: If moisture is the culprit, locate and address leaks or other sources of excess moisture before repairing the paint.
- Clean and Prepare the Surface: Clean the affected area thoroughly to remove any dirt, grease, or loose paint. Sand the surface lightly to create a smooth and even base for the new paint.
- Scrape Off Loose Paint: Using a sharp scraper, carefully remove any loose or bubbling paint to expose the underlying surface.
- Apply Primer and Paint: After cleaning and preparing the surface, apply a compatible primer and allow it to dry completely. Apply a thin, even layer of paint, and avoid excessive thickness.
- Ventilate the Area: Ensure adequate ventilation during the application and drying process to allow moisture to escape and prevent trapping air beneath the paint.
FAQ on Paint Bubbling
To further enhance your understanding, here are some frequently asked questions about paint bubbling:
- Q: Why is my paint bubbling only in certain areas?
A: Moisture accumulation or underlying surface issues may be concentrated in specific areas, causing isolated bubbling. - Q: Can I fix paint bubbling myself?
A: Yes, with proper tools and techniques, it is possible to repair paint bubbling on your own. - Q: How long does it take for paint bubbling to fix?
A: The duration depends on the severity of the problem and the drying time of the paint. Allow sufficient time for moisture to dry out and the paint to cure properly.

Image: www.tasteofhome.com
How To Fix Paint Bubbling On Wall
Conclusion
Bubbling paint can be a frustrating problem, but it’s one that can be effectively addressed with the right approach. By identifying the underlying cause, preparing the surface properly, and following the expert tips outlined in this guide, you can restore your walls to their pristine condition.
If you’re still facing difficulties or the paint bubbling persists, consider consulting a professional painter for assistance.
We hope this article has been informative and helpful. If you found this content valuable, we encourage you to share it or engage with us in the comments below. Your feedback helps us improve our content and reach more homeowners.