Cassette players, those nostalgic audio companions, may occasionally encounter hiccups that render them unplayable. Whether it’s stubborn silence or muffled tunes, reviving a cassette player can be a rewarding endeavor. Let’s delve into the potential culprits and practical solutions to restore your musical memories:

Image: www.youtube.com
Electrical Hiccups: The Power
-
Power Connection: Begin by verifying that the cassette player is securely plugged into a functional electrical outlet. Inspect the plug and cord for any visible damage or loose connections.
-
Battery Trouble: If your cassette player operates on batteries, replace them with fresh ones to eliminate any power deficiencies. Ensure proper battery polarity when inserting.
Mechanical Malfunctions: Uncover the Inner Workings
-
Belt Disengagement: Inside the cassette player, a belt connects the motor to the capstan, enabling the tape to move. A worn or disengaged belt can halt tape movement. Access the belt and check for any slack or breaks. If necessary, replace the belt with a suitable compatible model.
-
Dirty Capstan or Pinch Roller: These components, responsible for guiding and engaging the tape, can accumulate dirt and grime over time. Clean them gently using a cotton swab dipped in isopropyl alcohol to remove any debris obstructing smooth tape handling.
-
Gummed-up Gears: Mechanical gears within the cassette player can become sluggish due to accumulated dust or lubrication loss. Apply a small amount of lubricant specifically designed for cassette mechanisms to the gears, enhancing their smooth operation.
Electronic Issues: Delving into the Circuitry
-
Head Alignment: The magnetic tape passes between a pair of heads during playback and recording. Misalignment of these heads can cause distorted or muffled audio. If you possess the technical expertise and equipment, adjust the head alignment according to the manufacturer’s specifications.
-
Faulty Capacitors: Capacitors, electrical components that store energy, can degrade over time. Replace any bulging, leaking, or visibly damaged capacitors on the circuit board. However, this requires soldering skills and familiarity with electronics.
-
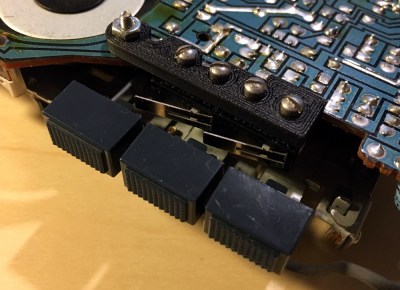
Broken Wires or Connections: Inspect the circuit board for any broken or loose wires or connections. Resolder any loose joints or replace damaged wires to restore electrical continuity.

Image: hackaday.com
Environmental Factors: Moisture and Temperature
-
Moisture Contamination: Exposure to excessive moisture can damage cassette tapes and internal components. Keep the cassette player in a dry environment and avoid placing it near sources of humidity.
-
Extreme Temperature Variations: Extreme temperatures can cause mechanical components to expand or contract excessively, leading to malfunction. Operate the cassette player within a moderate temperature range to minimize thermal stress.
Other Considerations: Cassette Related
-
Damaged Cassette Tape: The cassette tape itself might be the culprit. Inspect the tape for any visible damage, breaks, or excessive slack. If the tape is damaged, consider replacing it with a new one.
-
Incorrect Tape Type: Cassette tapes come in various types, such as Type I (normal), Type II (chrome), and Type IV (metal). Ensure that the cassette player is compatible with the type of tape you’re using.
How To Fix A Cassette Player That Won’T Play
Conclusion
Restoring a cassette player to its former glory can be an enriching experience. By systematically troubleshooting the potential causes outlined above, you can confidently diagnose and rectify the underlying issues. Remember to exercise caution when handling electrical components and follow safety precautions. Once the cassette player is up and running again, you can rediscover the charming melodies and memories that cassettes hold.